
Business owners understand the need for an online presence that goes beyond claiming an unclaimed YELP page.
Indeed, a professional appearing website is the new minimum when it comes to demonstrating a strong online business offering.
Oftentimes, entrepreneurs will put off this crucial step for fear of the difficulty involved with setting up a page that they can be proud of to represent their business.
When it comes to building an online presence, learning how to design a web page using WordPress has never been easier.
Prior to designing your webpage, you will first need to download WordPress to your device. It is at this time that you will also want to select a theme. Not only is this step easy, but once the theme has been selected, all the coding needed to build the page layout is automatically imported along with the selected thematic page meaning that no computer coding knowledge is needed.
Creating WordPress Pages is Easy
Creating WordPress pages is easy regardless of the user's experience.
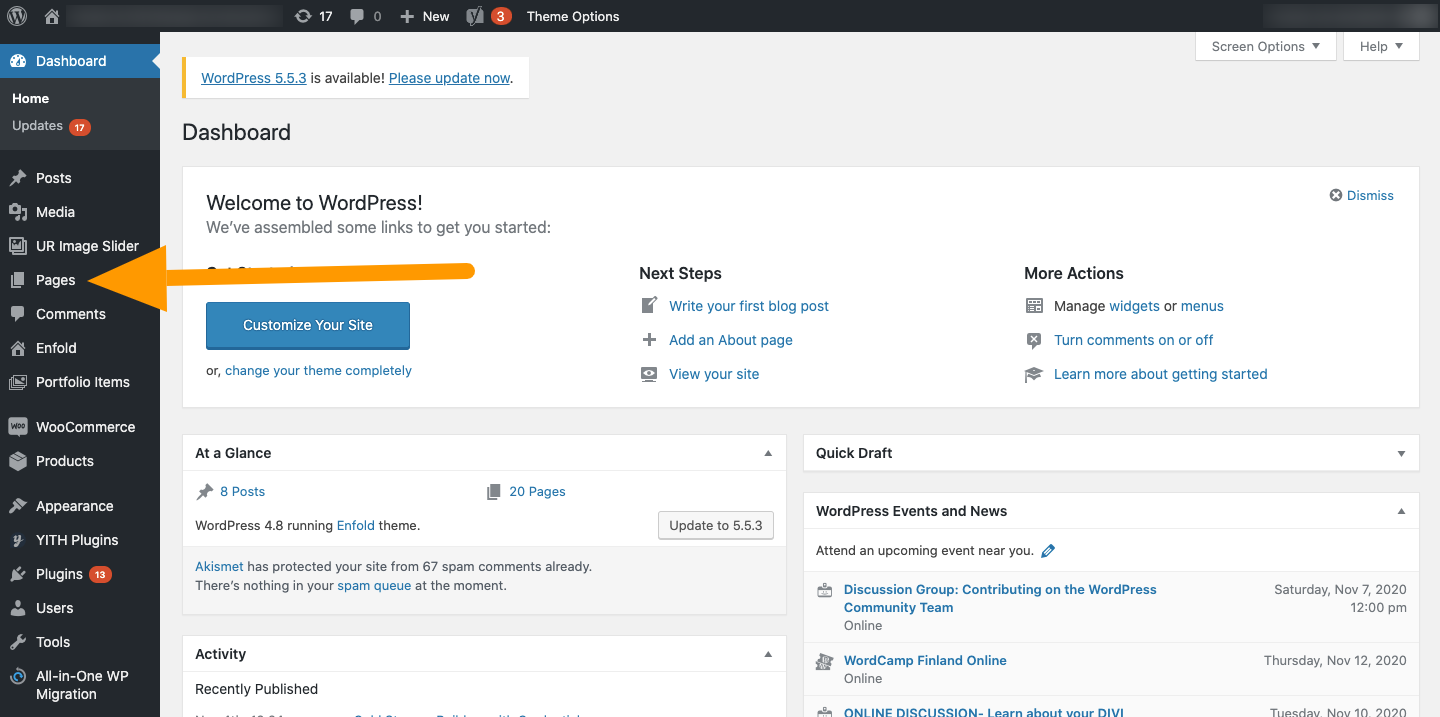
First, look to the left hand sidebar marked "Pages".
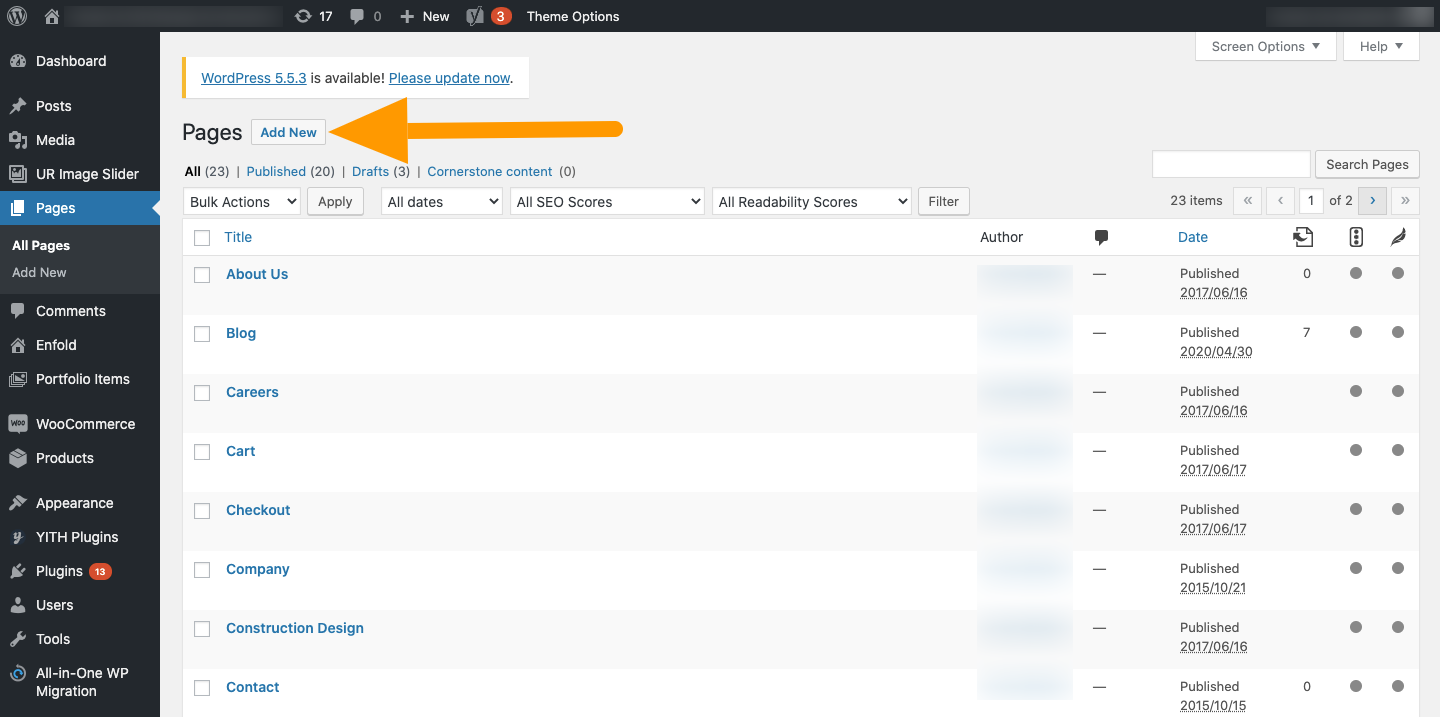
Then click on the "Add New" tab.
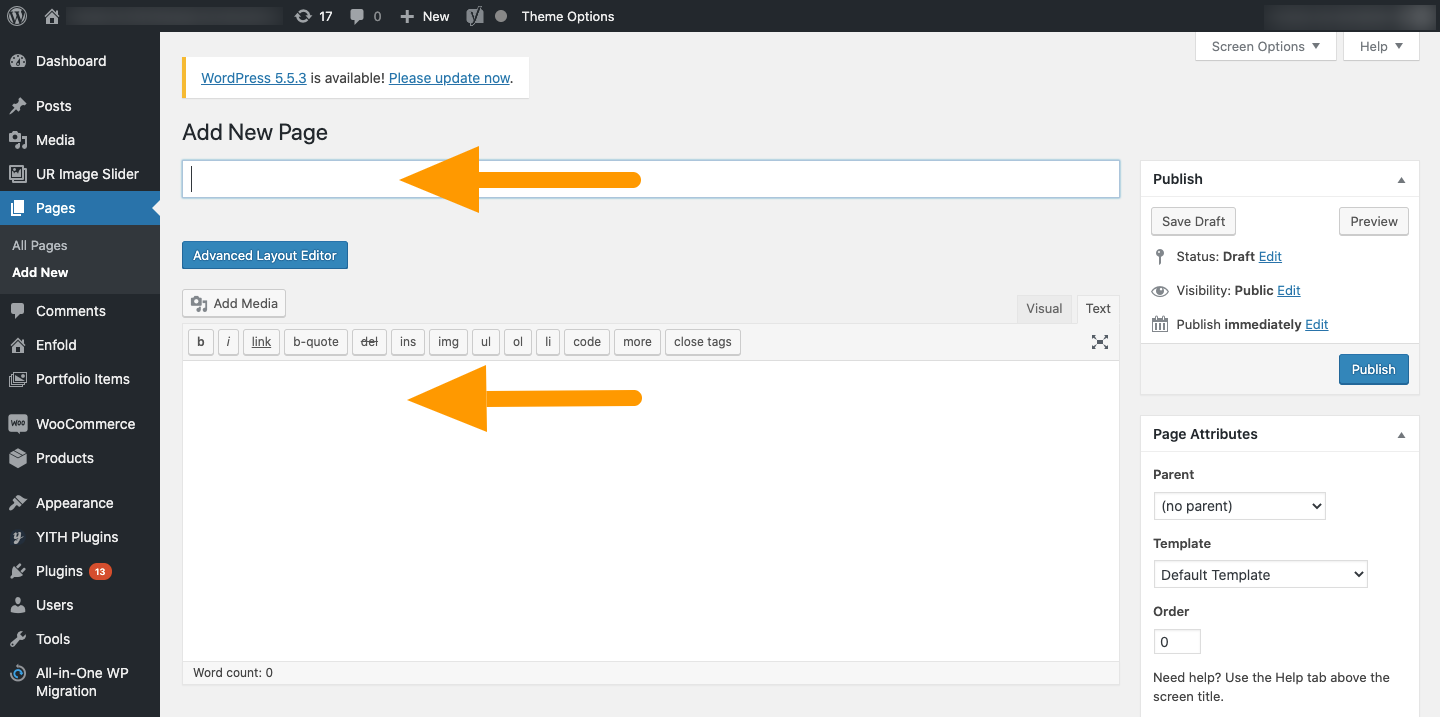
At this point, you will be able to craft a title and add content to that new page, which includes the ability to add images to a layout that is, as mentioned, already coded into the page when the theme is selected.
These pages can include the array of titles that one has come to expect when visiting a given website including "About," "Services," or "Contact Us" pages that serve to help visitors efficiently navigate your site.
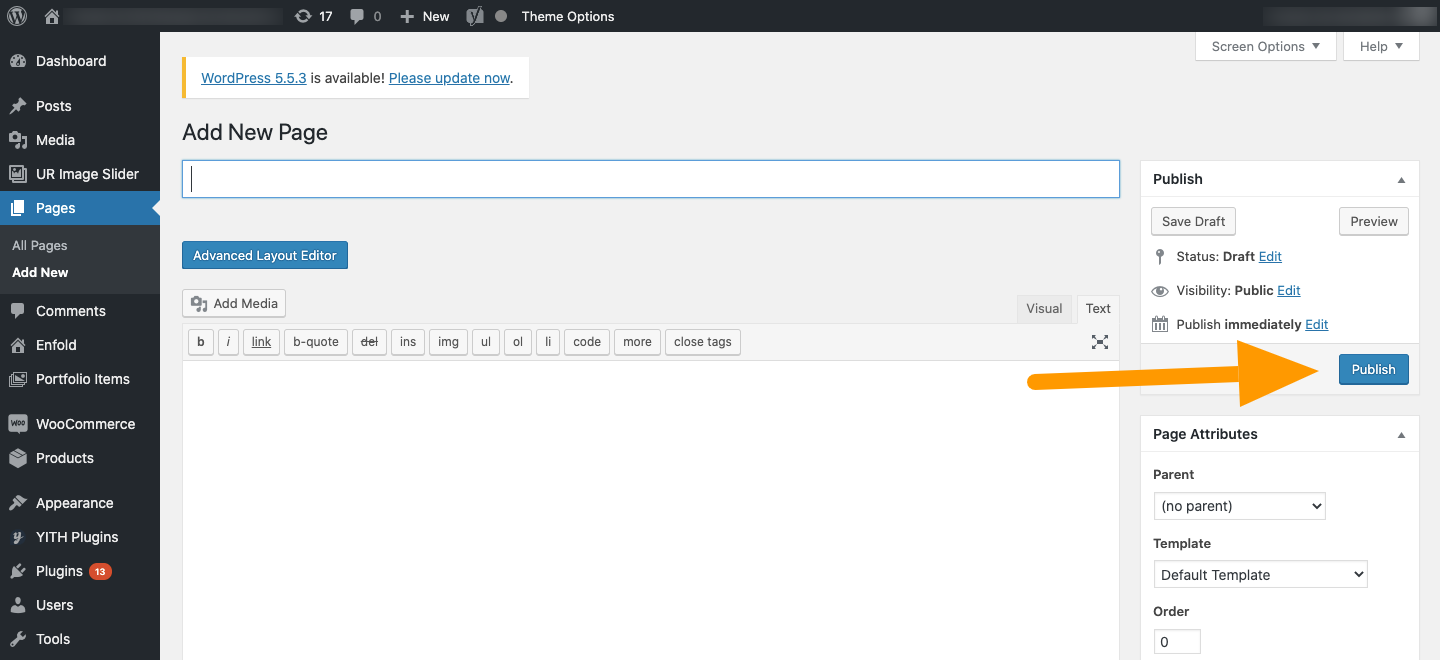
Once the content additions and editing have been completed, the website creator will need to look towards the right side of the screen for a "Publish" button. It will stand out owing to the bright blue color. Once the blue publish button is clicked that particular page will immediately be live online.
Drag and Drop to Organize WordPress Pages
Once the pages have been developed and created and given life with the power of WordPress publication it is time to organize those pages in accordance with your particular choices.
Begin your organization efforts by identifying the "Appearance" tab on the left side bar.
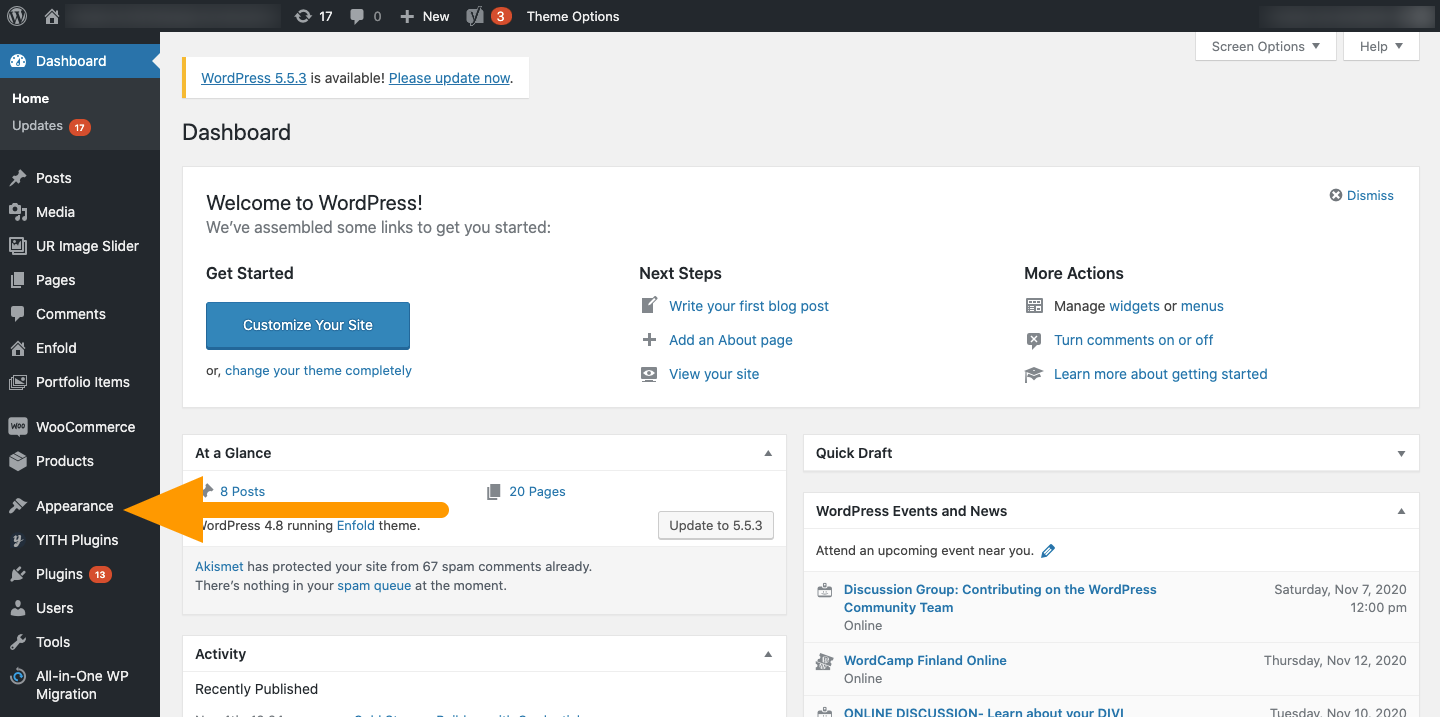
Once that tab is located, click on the "Menu" button beneath to begin moving pages from one place to another.
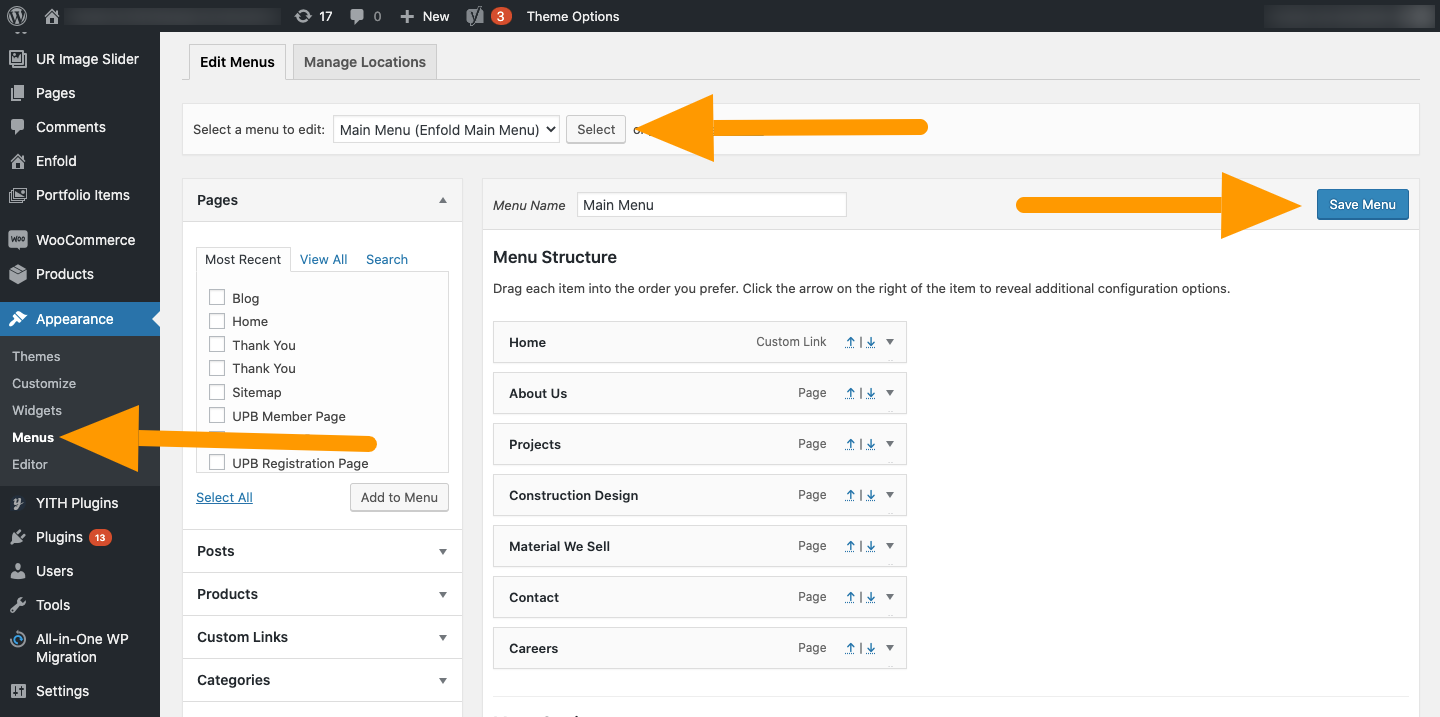
Pages created, as in the above example, are readily evident on the menu page and easy to find in the section labeled "Page widget." Specifically, each title can be manipulated and moved simply by dragging each title to the preferred presentation on the new WordPress website.
For those interested in establishing an online presence, there is no way to get around the fact that professionalism demands a website that commands attention and earns respect. Utilizing WordPress means that users are afforded an intuitive and user friendly platform that can take any idea and turn it into a vibrant online website that you can be proud to call your own.
Author: Darrin Gerr, CEO of Agency Jet
More Resources